How To Translate
To translate T-Selector’s storefront texts, open the app dashboard, go to “Translate”, click “Add Translation”, pick the country, translate the fields you need, and submit. Each country can carry its own wording. Selling to Germany and Sweden from one store? The VAT toggle can read “inkl. MwSt.” for one and “inkl. moms” for the other.
The texts you translate here are the ones T-Selector renders in your storefront — the VAT toggle labels, the tax-inclusive/exclusive wording and the B2B validation field labels. It does not translate the rest of your store; for themes, products and checkout, Shopify’s own Translate & Adapt covers that layer. Keeping the two in the same language per market is what makes the storefront feel native.
Translating, step by step
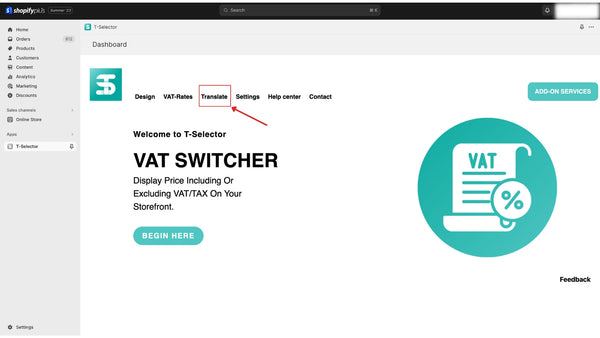
Step 1. When you are in the dashboard, click on “Translate”.
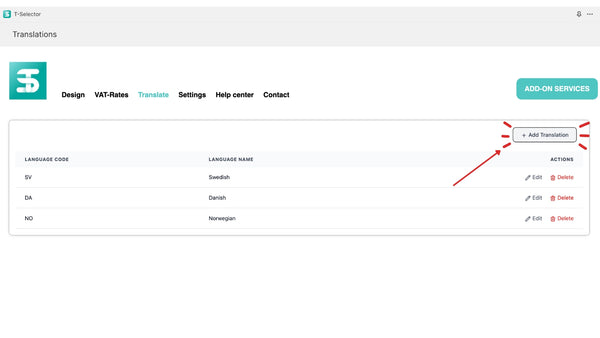
Step 2. Start by clicking on “Add Translation”.
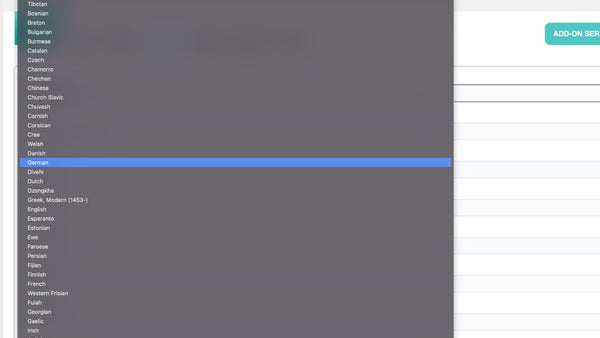
Step 3. Select the country you want to translate.
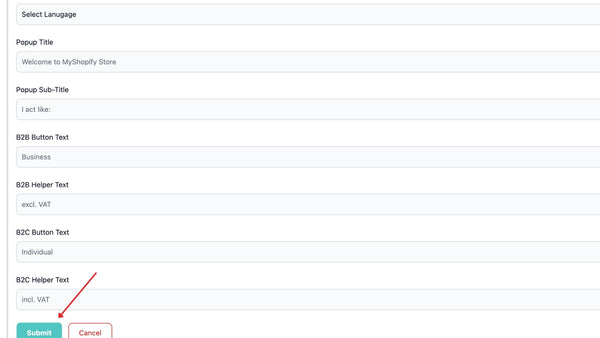
Step 4. Translate where needed and click submit.
Optional step 5. Repeat steps 2 to 4 if you want to add multiple countries.
Why per-country wording matters
A VAT toggle only builds trust if the customer instantly understands it. “Ex. VAT / Inc. VAT” reads fine in the UK, but a Swedish B2B buyer looks for “exkl. moms” — the phrase they would type into a search engine. Matching local tax vocabulary per market removes a small moment of doubt exactly where pricing trust matters most.
Once the wording is in place, make sure the rates behind it are right too: our guide on how to set VAT-rates walks through country-specific rates in the same dashboard.
Need help? Read the T-Selector Help Center or email us.